Saturday, December 3, 2011

Christmas Book Advent Calendar

Every year I add a new Christmas book or two to our collection.  The kids love to read these books we only pull out once a year.  The other day I heard a lady talking about a tradition she has.  Instead of an advent calendar, she wraps up all of their Christmas books, she has 24, and lets the kids open a new one each day.  Even though they are their books that they have had for years, it is always exciting to open it and read it over and over until Christmas.
 
If you don't have quite that extensive of a collection, you can always pick them up at the Dollar Tree, Target's Dollar Spot, or even Goodwill and the 1/2 Price Book Store.
 
This year the book I added to our collection is The Little Red Elf.  It is a take on The Little Red Hen.  The illustrations are beautiful!  They are available at mommyshop in Overland Park, Kansas, or online from http://www.kidztales.com/
 
Another VERY favorite book of ours is Max Lucado's The Crippled Lamb.  It is the story of Jesus' Birth from a little lamb's perspective.  It is absolutely adorable and a fabulous message.
 
Amy

Wednesday, November 30, 2011

Yearly Scrapbook Ornament

I started this last year...I found these cute chipboard albums.  They consist of 5 different circles, so I chose 10 pictures of each of my kiddos.  It is a fun way to grab 10 photos of the current year to preserve year after year. It took no time.  This year I found some at Michael's shaped like Christmas bulbs. 

This is how I displayed them last year among the greenery in the entry way.  This year I think I'll try the fireplace mantle. 


Saturday, October 29, 2011

Apple Nachos

3 medium apples, sliced 1/4 inch thick
caramel ice cream topping
1 1/2 cups mini marshmallows
1 Tbsp butter
1/4 cup mini chocolate chips
1/4 cup chopped dry roasted peanuts

In a microwave safe bowl melt marshmallows and butter; stirring occasionally.  Meanwhile, arrange apple slices on a large plate or cookie sheet. Drizzle with caramel topping.  Then drizzle with the marshmallow mixture.  Sprinkle chocolate chips and peanuts on top and enjoy.


Friday, October 28, 2011

Edible Eyeballs


Edible Eyeballs
1 bag round or square pretzels
1 bag white candy disks (In the Wedding Section at Walmart)
1 bag Chocolate Chips
1 container red sugar sprinkles

Preheat your oven to 350 degrees F. Place a single row of pretzels on a baking sheet. Then top the pretzels with the white candy disks. Bake for 3-4 minutes or until white candy is soften, but not melting through the holes in the pretzels. Remove from oven, sprinkle with the red sprinkles and place an upside down chocolate chip in the middle of the white candy disk. Place in your refridgerator for 20 minutes. They will remain hard after you take them out.

You could also use M&M's and put the M down. You could use green, blue, brown or even red.

National Apple Month

Here is a fun snack to feed your kids around Halloween. 

Apple Smiles

All you do is slice your apple, spread peanut butter on one side of the slice, place mini marshmallows on the peanut butter and then top the marshmallows with another apple slice that has peanut butter on it.  The kids will love it.  As you can see some of our smiles are missing teeth for the spirit of Halloween.

Enjoy!

Monday, October 17, 2011

Mason Jar Pumpkin Candles

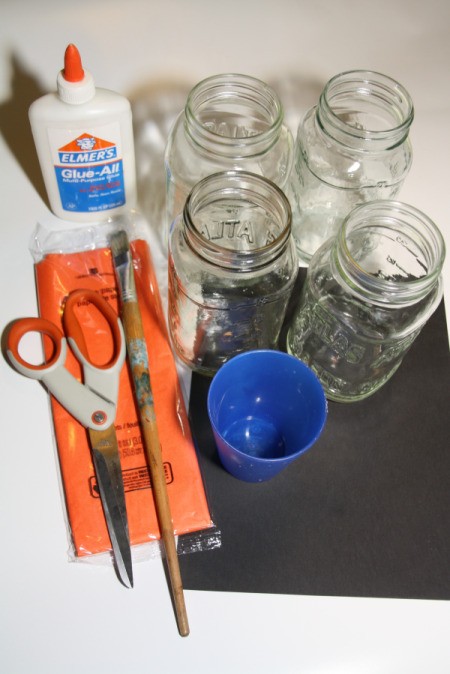
Use a few old Mason jars to make some cute glowing jack-o-lanterns that you can use year after year. This is great project to do with the kids. They love to make funny and spooky faces on their jars. Plus they make awesome decorations on a table or in a window.
Approximate Time: 1 hour

Supplies:

  • Mason or recycled glass jars
  • scissors
  • orange tissue paper
  • black construction paper
  • paint brush
  • Elmer's glue
  • small plastic cup or dish
  • X-acto Knife (optional)
Supplies for Jack-O-Lanterns

Instructions:

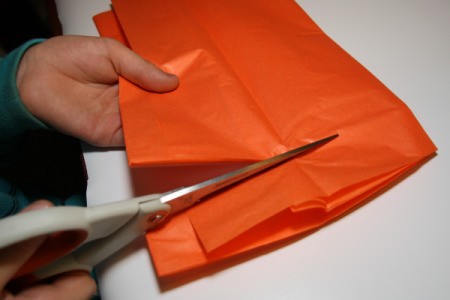
Cut the tissue paper into 1 inch strips. A little wider or thinner doesn't matter. We cut the tissue paper while it was folded. So the longs strips could each be cut down in thirds.
Cutting Strips of Orange Tissue Paper
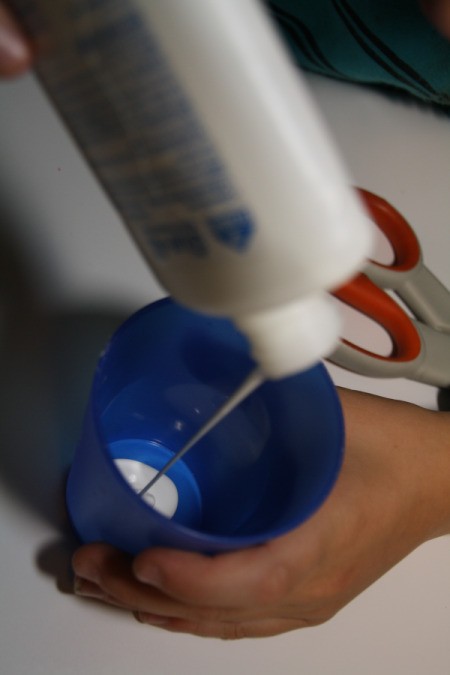
Pour a little glue in your container and add some water into it. I did about a tablespoon of glue with a half cup of water and it was more then enough for this project.
Pouring Glue in Blue Cup
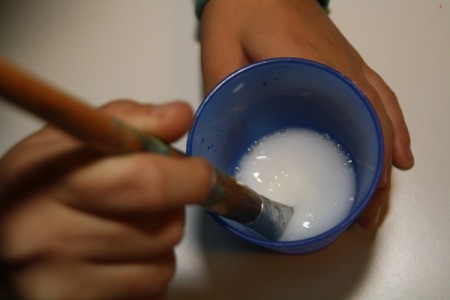
Mix the glue and water with the brush.
Using Paint Brush to Mix Glue and Water
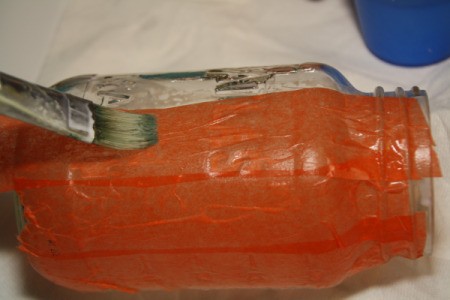
Then, one at a time, lay the strips of orange tissue paper on the outside of the Mason jar and stick them down vertically with glue wash. Overlapping them a little will give your finished jar a more pumpkin like look.
Putting Orange Tissue Paper on Mason Jar
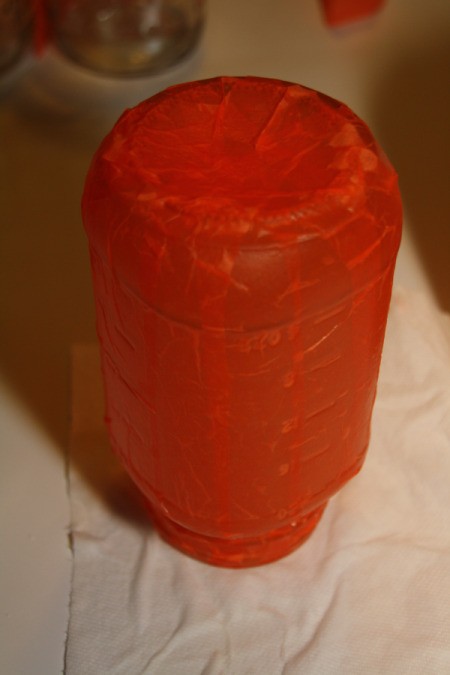
Turn the Mason jar upside down to dry. I used a mat with a couple paper towels on top to make sure no glue got on my table.
Upside Down Mason Jar With Orange Paper
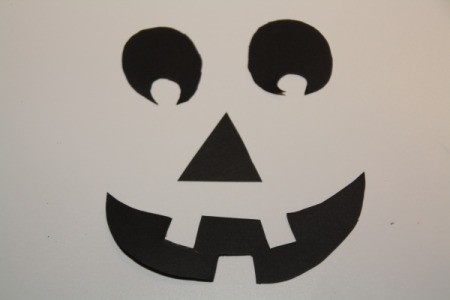
Use the scissors or X-acto knife to cut out Jack-o-lantern faces or other Halloween designs.
Cut Out Black Paper in Jack-O-Lantern Face
Stick the faces to the side of the orange Mason jars how ever you like. I used my extra glue mixture but a little dab of glue on the back of each piece of paper would stick them down just as well.
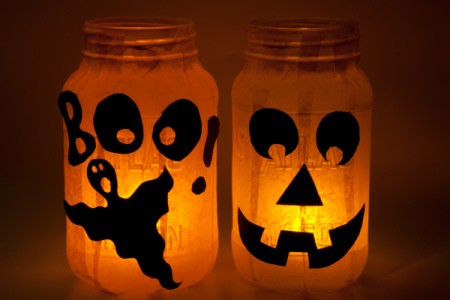
We put LED tea lights in ours so we can set them on our window sill and there is no fire hazard near the curtains. Votive candles would work very well in these also.
Jack-O-Lanterns Glowing at Night

Thanks to our friends at http://www.thriftyfun.com/ for this great idea!

Amy

Sunday, October 16, 2011

Monster Cookies in a Jar

We always get our nieces and nephews something for Halloween.  They are getting older now, so it is harder to come up with something for all of them.  This year I decided we would make Monster Cookies in a Jar and decorate the jars like monsters.  The kids and I headed to Hobby Lobby, bought some jars and found some stickers that you can decorate pumpkins to look like monsters.  When I bought these I thought they would be the same size as the pictures on the outside of the package, but they were much larger.  Here are some from Oriental Trading that would work great.  I have used these before on pumpkins, but didn't have time to order them this year.  They would be the perfect size.  We made due with what we had and I think they turned out great.


I let the kids pick out the monsters they wanted and decorate the jars.  We bought the smooth Mason Jars at Hobby Lobby and they happened to be 50% off that week too.


Here are the jars.  Next we added the monster cookie mix as follows:

2 cups old-fashioned oats
1 cup brown sugar
1/2 cup M&M's
1/3 cup sugar
1/2 tsp baking soda
1/4 tsp salt
1/2 cup mini chocolate chips

Layer the ingredients in the order given into a wide-mouth 1 quart canning jar.  Make sure to pack the brown sugar before adding the M&M's.  We used the bottom of our ice cream scooper for this job and it worked great.  We also topped our jars off with more M&M's to add more color and fill the jars.


Then we added the rest of the directions to the top of the jar. 

Monster Cookies
In a large bowl, cream 1/4 cup softened butter, 1 egg, 1/2 cup peanut butter and 1/2 tsp vanilla.  Slowly add the Monster Cookie mix in this jar until well blended.  Form dough into 1 inch balls, place on a greased cookie sheet and bake at 375˚F for 12 minutes.


You can click here for a printable of these tags.

We decided to embellish the jars a little more with some pipe cleaners to make hair.


You will also notice the jar on the far left has already made cookies in it.  One of our nieces is in college and lives in the dorms, so I made her a jar with the cookies already made.  Then we just made one jar per family for the rest of the nieces and nephews.
 

Related Posts Plugin for WordPress, Blogger...