Tuesday, July 9, 2013

Cottage Cheese Salad

My family LOVES this easy side dish!  In fact, this is the ONLY way my kids (and myself) will eat cottage cheese.


Cottage Cheese Salad
1 (24 oz) container cottage cheese
1 (8 oz) container Cool Whip
1 (3 oz) pkg Jello, unprepared (any flavor, we prefer cherry)

Mix all the ingredients together and let it set in the refrigerator until firm.

This recipe can also be found in the My Family Meal Planner #2 and Meal Planner for 2.  Simple, Easy meals planned for you for 4 days per week for an entire year!  All the recipes are included and the weekly grocery lists! www.myfamilymealplanner.com


Monday, June 24, 2013

4th of July Jello Cake

Jello cake is my favorite cake.  Just ask my mom.  I always requested a cherry Jello cake for my birthday when I was younger.  I love that the cake is cold, seems light and the frosting is amazing!  I thought it would be fun to try to make my favorite cake a little festive.  (Any excuse to make it!)  It worked out great!


Jello Cake
1 white cake mix (plus ingredients listed on the box)
1 (3 oz) pkg of Jello any flavor (for this recipe I used 1/2 a box of Berry Blue and 1/2 a box of Cherry)
3/4 cup boiling water
1/2 cup cold water

Frosting:
1 container Cool Whip
1 (3 oz) pkg Instant Vanilla Pudding
1 1/2 cups cold milk
1 tsp vanilla

Make cake as directed on the box.  Let the finished cake cool for 20 minutes or longer.  Then use a fork and poke holes all over the cake.  Mix 3/4 cup boiling water with your Jello.  After all of the Jello is dissolved, add the 1/2 cup cold water.  Then pour the Jello over the cake and put the cake in the refrigerator to allow the Jello to set up.   (For this cake, I stirred up my cherry Jello first.  I made the whole package of cherry, but only poured 1/2 of it over the cake.  The other 1/2 I put in a bowl and put it in the refrigerator to eat by itself.  I then let the Jello in the cake set up for a couple of hours.  I then made my entire box of berry blue Jello and let it cool to room temperature.  I then added a few more holes to the cake with my fork and poured 1/2 of the Jello mixture over the cake.  The other 1/2 I put in the refrigerator to eat later.  I then put the cake back in the refrigerator to allow the berry blue to set up.)  After an hour or so, you can begin to make your frosting.  Mix together the Cool Whip, pudding, milk and vanilla.  Frost the cake and store the cake in the refrigerator.


Tuesday, June 11, 2013

Oven Fried Broccoli

I really do NOT like broccoli, but I know it is good for me, so I keep trying it.  I am okay with in stir fry or fresh and dipped in ranch dressing, but I can not eat it steamed as a side dish.  Yuck!  I found this recipe on Pinterest and thought I would give it a try.  There was no direct link to the recipe, it was just listed under the picture.  The pinner claimed that her husband would rather have this oven fried broccoli instead of french fries.  I thought there was no way it could be that good.  I am happy to report that it is that good!  It really doesn't taste too much like broccoli and it has a crunch to it.


Oven Fried Broccoli

1 bunch of broccoli
2 cloves of garlic, minced
salt & pepper (just a few shakes of each)
olive oil(I use a few tablespoons, just enough that when you shake the bag there is some on each piece of broccoli, but not so much that you have olive oil puddled in the bottom of your bag)

Cut your broccoli into little pieces and put them in a Ziploc bag.  Add the minced garlic, salt, pepper, and olive oil.  Seal the Ziploc bag and shake until all the pieces are coated with olive oil and the garlic is spread about the broccoli.  Pour it out on a pan (I use my Pampered Chef stone) and bake at 425 degrees F for 20 minutes.  

I like to add carrots to the mixture too.  The finished product has a garlic taste and the broccoli is crunchy.  My 3 year old even asks for seconds!


Monday, June 10, 2013

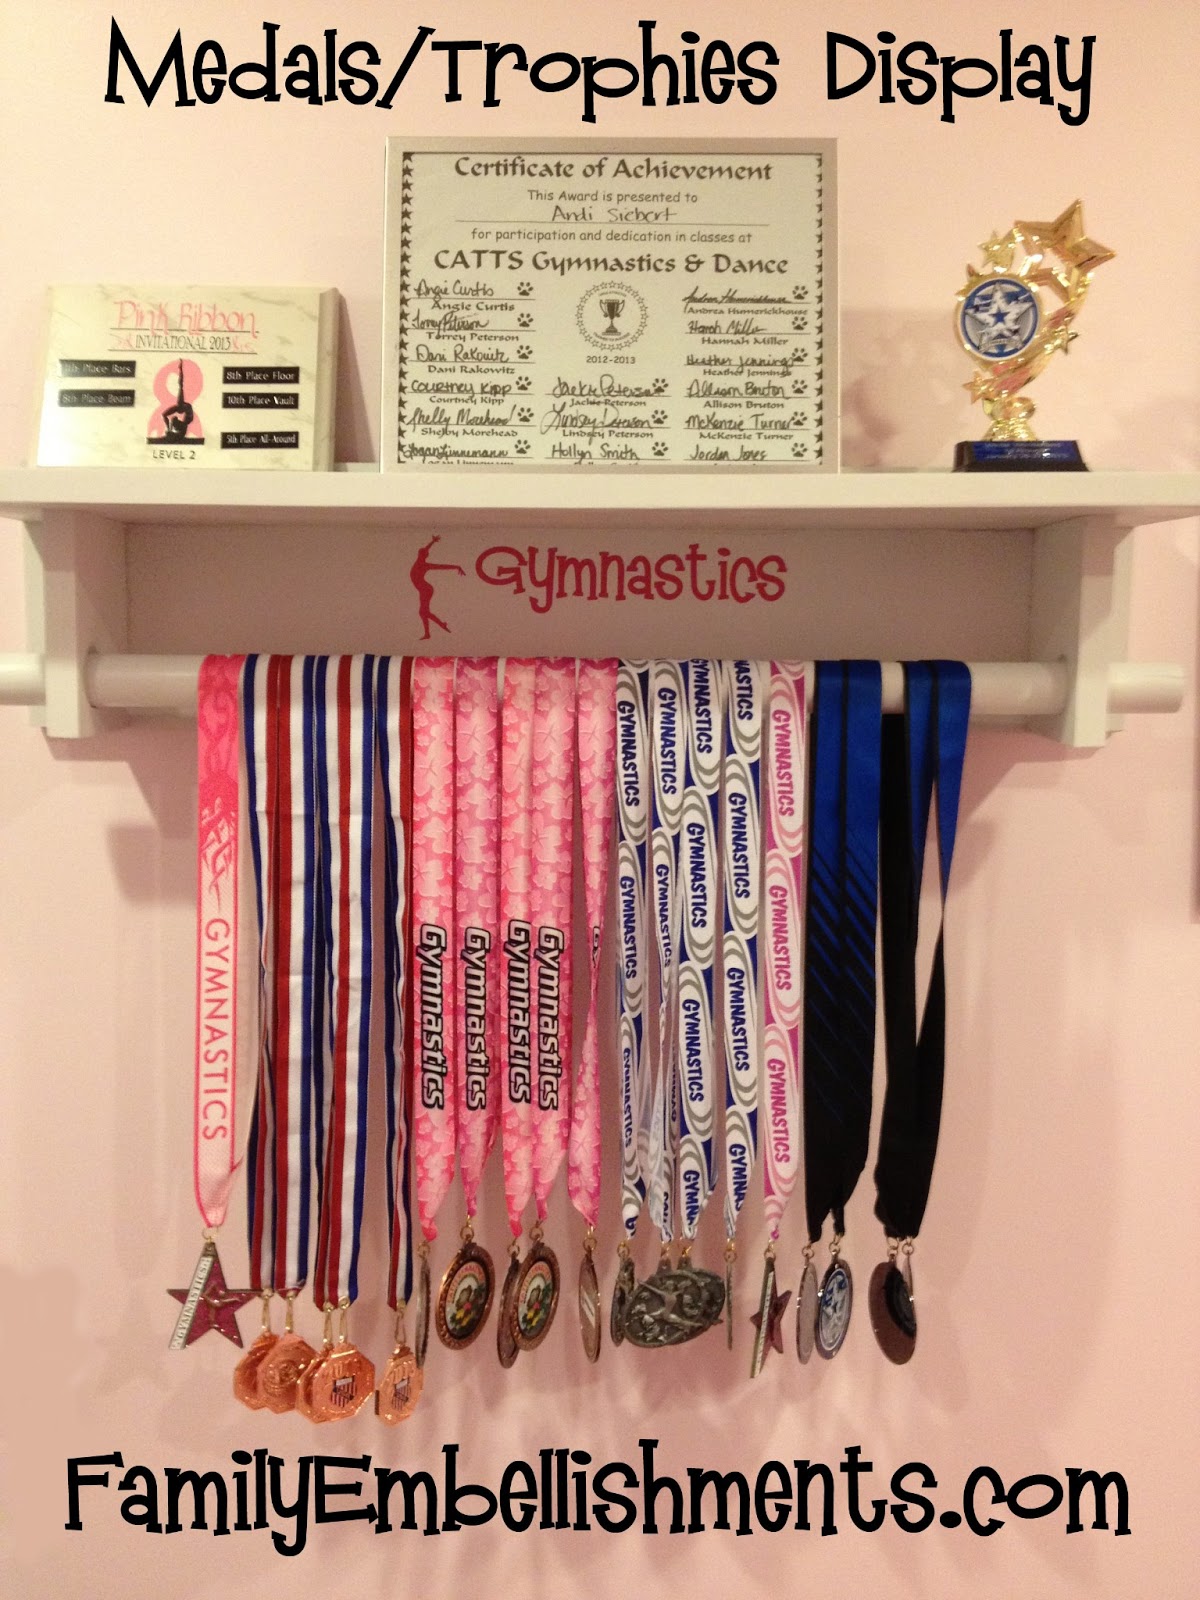
Gymnastic Medals/Trophies Display

I am so excited!  We finally finished my daughter's shelf for all of her gymnastics medals.  I wanted something that was easy to add more medals to and we were also able to set trophies on top.  I searched Pinterest and put a few ideas together and came up with this.


I had my handy husband make it for me and then I painted it and added the vinyl lettering that I cut out with my Silhouette machine.  It is comparable to a quilt rack.  The bar the medals are hanging on is similar to a paper towel holder.  You just slip it out of one side, add your medal and slip it back in the hole.  

This could work for any sport!  My son is already asking for one for all of his soccer medals.


Wednesday, June 5, 2013

Monster Cookie Bars

We are loving these Monster Cookie Bars!  Best part is the recipe makes two 9x13 inch pans or one 11x17 inch pan.  I like to make one for our family and give one to a friend.  (The dough is really good too, but eat with caution because there are raw eggs in it.)


Monster Cookie Bars

Cream together:
1/2 c. margarine (you can use 1 cup to make them chewier)
1 c. sugar
1 c. brown sugar 

Mix in:
1 c. peanut butter
3 eggs

Add:
1 tsp baking soda
1 1/4 c flour
2 1/4 c quick oats

and then add:
1 c. M&Ms (or Reeses Pieces)
1-2 c. chocolate chips

Bake at 325 degrees for 20-25 minutes. Use an 11x17 inch pan or two 9x13 inch pans.


Wednesday, February 27, 2013

Dr. Seuss' Birthday

This Saturday is Dr. Seuss' Birthday. To celebrate, this Friday, my son's second grade class will be reading Dr. Seuss books and having Dr. Seuss inspired treats. I thought I would share with you what I am taking. I went for the Lorax theme and will be taking Nutter Butter Lorax cookies and suckers with the Lorax's mustache on them.


The cookies were very quick and easy!  I purchased a package of Nutter Butter cookies and 1 container of white frosting.  I made yellow and black frosting, but each one in a freezer Ziploc bag and snipped a very small hole in the corner of the bag.  I then just piped the frosting on the cookies.


For the suckers, I was lucky enough to be able to use my mom's Silhouette machine and cut the mustaches out of yellow cardstock.  If you do not have a Silhouette, you can just print the mustaches on yellow cardstock and cut them yourself.  Click HERE for the printable mustaches.  Put your mustaches on your suckers and you are set.  You could also use these on a bendy straw!


I hope you can celebrate Dr. Seuss in some way this week!


Friday, February 22, 2013

Oreo Stuffed Chocolate Chip Cookie Muffins

I have seen the Oreo Stuffed Cookies on Pinterest, but heard about this muffin on Facebook and thought I would give it a try.  They were delicious!


First we found our favorite Chocolate Chip Cookie recipe that is found in the My Family Meal Planner #2 and made a batch of dough.  (The dough I think is even better than the cookies!)  This can easily be done with store bought Chocolate Chip Cookie dough. 
 
Chocolate Chip Cookies
1 cup brown sugar
1 cup white sugar
2 eggs
1/3 cup butter, softened
½ tsp salt
2 tsp baking soda
1 tsp vanilla
1 cup Crisco shortening
3 ½ cups flour
1-2 cups chocolate chips
 
Preheat oven to 375 degrees F.  Mix everything together except the flour and chocolate chips.  When mixed thoroughly, blend in flour and then fold in the desired amount of chocolate chips.  Bake for 10 minutes if you are just making chocolate chip cookies, not Oreo stuffed.
 
After the dough was made, we lined our muffin tin with liners and sprayed the liners with cooking spray.  I then used my handy Pampered Chef scoops.
 
I used the small one and put a scoop of cookie dough in the liner.
 

I added an Oreo on top of that and pushed is down a little.


Then I topped the Oreo with another scoop of cookie dough using my medium sized Pampered Chef scoop.
 
 
I decided to push the cookie dough down with my hand so that the Oreo would for sure be covered with the Chocolate Chip Cookie.
 
 
I then baked them at 375 for 10-15 minutes, making sure the chocolate chip cookie was golden.
 
 
The inside of the Oreo was warm and gooey.  They were awesome!  We even dunked them in milk!  (Yes, I still have Halloween Oreos.  I got them the day after Halloween for 50% off and store them in my freezer.  I had to stock up at that price!)


Related Posts Plugin for WordPress, Blogger...